Skills Corner: The Underpainting
From intuition-based painting to rigorously planned compositions, artists work in different ways. Yet across styles, many establish what is called an "underpainting" at the beginning of a new project. The underpainting of the artwork refers to its initial layers. An underpainting can be understood as a first compositional sketch or the foundational marks of a painting, inevitably becoming invisible or partially so as the painting progresses. In this blog post, I write about the underpainting as a guideline, why it matters, and the techniques I use to set myself up for a successful finished painting.
Defining the Terms
The first time I heard the term “underpainting” it was not in the studio but in literature. The Underpainter, a novel by Jane Urquhart, follows the life of an American painter. Mirroring the complex and hidden layers of the artist’s paintings, Urquhart’s novel unearths the artist’s relationships with friends, family, mentors, and romantic partners that most influenced his life and his painting. Reading The Underpainter first years ago and revisiting it more recently, I was reminded of the intrigue of an artwork beyond what we see on the surface. The underpainting is a sketch, a compositional map for an artwork. It is the story of what an artwork becomes: we can imagine what it was and how it began. Beneath the finished, visible surface of a painting, the underpainting is at once invisible and foundational.
Why Begin a Painting with an Underpainting?
For many artists, the underpainting is the foundation for the finished product. By sketching lightly and working fluidly, changes to form, value, and colour can develop throughout the painting process. The underpainting helps to establish the main composition and main values of the painting before getting into details or colour relationships.
For me, working with an underpainting encourages the treatment of the whole canvas surface before I go in and focus on details. Perhaps we’ve all been in the position of anxiously starting in on the magical stages of say, making an animal’s eyes come alive or playing with flickering light between leaves, only to find that our proportions are off and our meticulous work has been in vain. An underpainting helps set me up for a successful painting process. Here below is a step-by-step process of how I build an underpainting.

Getting Started: Keep it Light
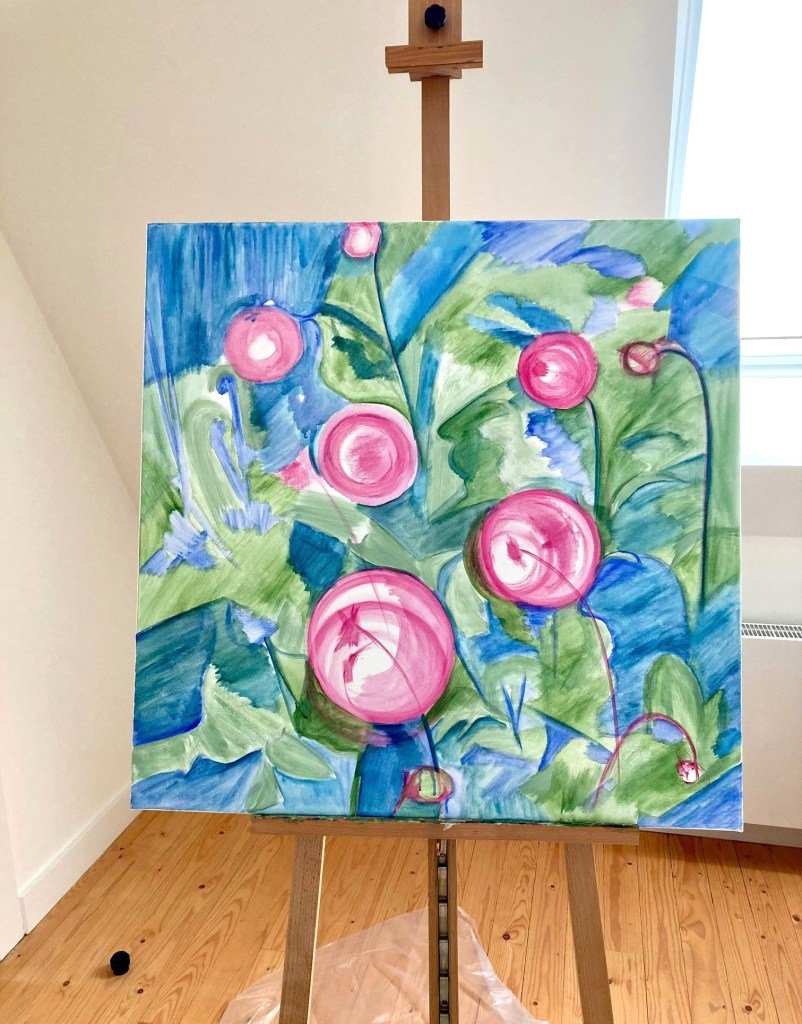
I thought of this topic while working on my latest painting, Dancing Dahlias. I started with a blank canvas and my reference images: I had taken photos of dahlias at the Vordenstein garden in Schoten (Belgium) in the autumn of 2022 and knew I wanted to paint them. Focusing on the general composition, I sketched rough shapes and values. I identified the largest darkest areas and the general shapes of the flowers. I used blue and pink for this, but an underpainting can also be done using only one colour.
At this stage, I focused on working quickly and without too much paint. I am not worried about any particular line or colour at this point. I don’t want to put down too much paint. Beyond wasting paint, this would complicate my ability to change and develop my forms and colours as I go. Seeing light, rough outlines, I am reminded that this is just a sketch and thus is subject to—and in need of!—change as I progress.
Value & Colour
Since I started by sketching the darkest value areas of the painting (in blue), this has inevitably left all values that are lighter. The white or natural material areas of the canvas will be the lighter parts. Now I want to define a medium value. In one given painting there may well be multiple values ranging from dark to light. To begin to define these multiple values, I first add in a medium value. Again, this can be done using lighter or darker shades of one colour. Here, I opted to use different colours.
I put my medium value in with a green colour because there is a lot of greenery surrounding the dahlia blossoms. Choosing a colour that is near to the colour you will be using eventually has pros and cons. A positive aspect of sticking close to final colours is that your colour choice will help you keep all these loose lines clear in terms of what object or shadow goes where in your composition. However, this “pro” of helping us keep clear what’s what can become a negative point when we start to think in terms of “what we know” rather than “what we see”. As soon as I label this circular green blob as a “leaf”, I risk moving from looking to conceptualizing. That is, I risk thinking of the idea of a leaf rather than paying attention to the specific form in front of me. I wrote about that here in relation to drawing and here, specifically with regards to using negative space.
*Note: sometimes I paint my canvas with one colour in its entirety before beginning an underpainting. This is not necessary, but it helps to avoid any part of the canvas showing through if it is not sufficiently paint-covered. If I've first put down one colour on the entire canvas, I simply start my underpainting on top in a colour or colours I can see well against the background.

The blues represent the darker areas of my painting, the greens the medium areas roughly, and the pink I've used to outline my flowers. I continue to build my underpainting with various values and colours. I emphasize those areas where my light is. For sketching flowers in particular, I identify the centre—the stigma—of the flower and its stem to ensure a natural positioning of its parts; a nice curve to its stem.
Now, most of the canvas is covered with a thin coat of paint. At this point, I want my main shapes and values to be established. This means I have my composition outlined. I can still make changes, but I have a general map upon which to build.
From Underpainting to Painting:
It can be difficult to transition from underpainting to painting. Of course, the underpainting becomes the painting, indeed already is the painting, but how do we keep building? When I was finished my underpainting for Dancing Dahlias, I took some distance from the work. I took time to step back and take in what was on the canvas. This was a moment to evaluate the foundation of my painting. At this critical stage, I asked myself:
Am I happy with the composition? Is it balanced?
Are my main shapes in proportion? How do they relate to one another?
Have I established my main values (light, medium, dark)?
When I am satisfied with my foundation, I’m ready to commit to my painting. My next steps include developing more values and eventually introducing the colours I want for my finished painting. A blue can become a purple (or any other colour). I add nuance and detail to form, value and colour.
Challenges and the Finished Product
The challenge of this painting was deciding how I wanted to represent the many petals of the dahlia blossoms. I was not going for a photorealistic result, but I didn’t want something too abstract. I considered my options and took inspiration from my reference photographs, which show the blossoms in the foreground in focus and those in the background as blurry. I liked the variety of techniques that the play on focus allowed for and its communication of depth. I also liked the acknowledgement of the medium of photography as inspiring the painting.
I set to work painting the many petals of the in-focus dahlias. As always, I practised paying attention to form and colour rather than “what I know”. I used my tools—my various brushes—to get the effects I wanted: the swish of a brush established the upward orientation and curve of a petal. I was well beyond my underpainting, but it was nevertheless essential to get to this detail-centred stage of painting.
Here is the finished product: Dancing Dahlias, acrylic on canvas, 80 x 80 cm, 2023.

Thanks for reading!
If you like what you’re reading, please join my mailing list list to get updates on my latest posts.